For the longest time, the Pawn Game has been widely used to teach chess to beginning students. Sunil Weeramantry, then chairman of the Chess in Education Committee for US Chess, shared a different methodology rebutting this approach so that students can play an entire game sooner and with greater success. This method has since been adopted by successful educators around the world, and has now been endorsed by FIDE’s Chess in Schools Commission. The following paper was presented at the Chess in Education Workshop during the 1995 US Open in Concord, California.
The ever-increasing popularity of chess in education has seen the introduction of the game to younger and younger audiences. This inevitably raises the question: What is the most effective way to communicate basic skills and concepts?
In setting up the chessboard, the bottom right hand comer square has to be a light square. The chessboard itself consists of sixty-four squares, thirty-two light and thirty-two dark. Each player sees the chessboard his own way. Young children, for instance, may see a number of squares but have difficulty understanding that a row of alternating light and dark squares constitute a single line of movement. One move can include many squares. Ranks, files, and diagonals should be presented as roads or highways that pieces travel on. Once this concept is understood, explaining which piece uses which road becomes easier.
In keeping with the notion that the playing field should be mastered before the players are introduced, I prefer to discuss the markings on the chessboard next. The numbers and letters that designate ranks and files can be found on any modern demonstration board. These algebraic markings can be recognized even by a kindergartner who has not yet learned the entire alphabet. Introducing this simple grid and having the students identify a given square by letter and number not only teaches them a new language in which they can communicate but also makes it easier for the teacher to conduct classroom discussion. Note that the analogy with the game “Battleship,” a game many children are familiar with, is particularly helpful. That said, the importance of learning notation must not be confused with the value of recording a game. That will come later.
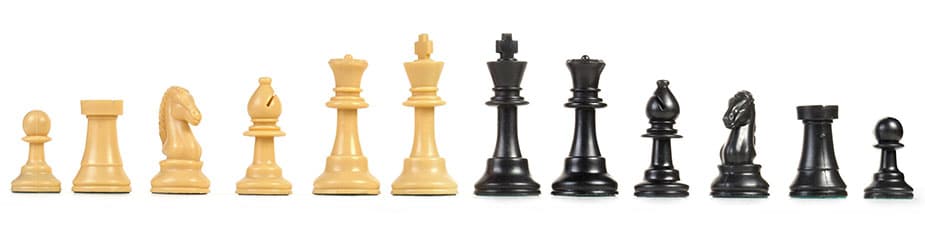
It is now time to set up the starting position and show what the chessboard looks like with both armies in place. The pieces should now be identified, and a brief explanation may or may not be provided as to their origin. I have found that the easiest way to show a student who has struggled setting up the board correctly, is to have him first place the two rooks in the comers followed by the eight pawns up front. Then, knights are placed next to the rooks and bishops next to the knights. At that point, it is easy enough to explain that the queen goes on her own color and the king occupies the remaining square. In the process, one recurring error is avoided.
The burning question is which piece to teach first. There are various schools of thought on this matter. One popular approach is to begin with the pawn and have the students gain immediate hands-on experience with the “Pawn” game. I have found this method to be confusing at best. After all, the pawn is the only piece that does not capture in the same way it moves. Capturing in chess should be taught as being an integral part of normal movement because in general, pieces do move and capture the same way. One risk in teaching the pawn first is that movement and capture may be seen as different functions. Furthermore, why introduce an exception as the first piece? Quite apart from the way it captures, the pawn cannot move backwards and changes shape when it reaches the other side.
The order of moves that has worked best for me is to begin with the rook. This introduces the simplest directional movement and one that a child is already familiar with: left, right, up and down. Thus, the rook can move along ranks and files traveling along familiar roads. Capturing can be shown as a part of normal movement and restrictions to movement such as not being permitted to jump over other pieces can be established.
The next piece to be introduced should be the bishop. Visualizing a diagonal appears to present a greater challenge to some young players than visualizing a rank or file. One solution is to have the student focus on color and to envision the bishop walking up and down a staircase that consists of squares of the same color.
Once the rook and bishop have been introduced, I generally pose the following question: Why is the rook more powerful than the bishop? Invariably, the first answer given is that the rook can travel in more directions. Once, when I pointed out that a bishop can also move in four directions, a student countered that it was not fair to cut a diagonal in two. Naturally, I pointed out that moving left or right, for instance, is the same as cutting a rank in two. Sooner or later, a student will find the right answer and say the magic word “color.”
Next comes the queen. By presenting the queen in this sequence, it is easy to show that she is the sum of the rook and bishop. It is also easy for the student to appreciate the relative strength of the bishop, the rook, and the queen. It should also be pointed out that these three pieces are long-range pieces and that the power of a piece is derived from the distance it can cover. Notice that all these pieces are governed by the same rules of movement and capture and are subject to the same restrictions.
The king is the most important piece but certainly not the most powerful. He can move in all directions like the queen, but only one step at a time. I have found it useful to describe the king as important because its capture would signal the end of the game. On the chessboard the king is more of a liability than an asset and does not enjoy the same power as a real life monarch.
It makes sense to introduce the concept of check and checkmate at this point.
One of the more difficult ideas to explain is that the king can never be taken off the board. Any piece can take any other piece, but no piece can take the king.
When the king comes under attack, check is announced. Check is synonymous with attack. A king who is in check must get himself out of check and may do so in one of three ways: run, block, capture. If a player does not get his king out of check, either intentionally or unintentionally, he must be given another chance to do so. An illegal move does not result in an automatic forfeit.
Using the four pieces that have been introduced so far, it is possible to illustrate various checkmates. It is helpful to have the student confirm the checkmate by verbalizing why the king cannot go to a particular square and why checkmate cannot be prevented in any other way.
The student is now ready to handle the two pieces that are exceptions to the rules that govern the other pieces. First: the knight. It is a short-range piece with a fixed movement but is different in that it can jump over other pieces. Teaching the knight’s move presents a challenge because the shape of its movement is not familiar to very young players. Informing a kindergartner that the knight moves in the shape of a capital “L” does not always make an impression. One method is to count three squares (1, 2, 3) and turn. This emphasizes that the long side has three squares and that there is a built-in change of direction. Some teachers prefer not to refer to the starting square as 1, but to describe the movement as one, two, and over.
One of the best ways to reinforce the fact that the knight jumps from one square to another is to surround the knight with a barrier of pawns. The knight can jump over the barrier and land on the first available square of the opposite color to the one he was on.
Finally, it is the pawn’s turn. It seems appropriate to me that the piece that creates the most problems should came last. The pawn’s behavior differs from the norm in three respects: it cannot move backwards; it does not capture in the way it moves; and, it even changes into something else when it reaches the other side of the board
The two special rules in chess are castling and en passant. The first must be taught; the second should be ignored until later.
When teaching castling, the student should get into the habit of moving his king first. The king should always move two spaces and the rook should jump over the king to the adjacent square. This will avoid the mistake some players make in castling long when they move their king too far. Restrictions on castling are important. A common error is to attempt castling when in check or have the king cross over a square that is under attack. Some students have indicated to me that they prefer not to castle because they feel trapped in the corner. The counter argument, naturally, is to demonstrate that when castled, they cannot be attacked in as many ways as when their king is in the center.
En passant is another story. It is more difficult to explain this on a board with algebraic markings because the fifth rank is not the same for both players. I prefer to delay teaching en passant until I am confident that all other moves have been mastered.
You can learn more about these Special Rules in our book “Great Moves: Learning Chess Through History.”
A player who has reached this stage of development is ready to explore basic strategy and to play a full game. I have found that the average student in second grade or below who is learning chess for the first time will need between eight and ten contact hours to reach this stage. The ratio of instructional time to playing time will vary depending on the circumstances and on the age of the students. For my part, I prefer to provide the hands-on experience towards the end of the course to minimize potential conflicts created by a lack of understanding of the rules.
© 2020 Sunil Weeramantry. This article is adapted from a presentation to the Chess in Education Workshop 1995
The National Scholastic Chess Foundation is a 501(c)(3) non-profit educational organization. Donations are tax-deductible. Relevant IRS information is available on request.